Chat Agent UI
It's recommended to use AG-UI to integrate with agents. Refer to this guide on how to integrate Spring AI with AG-UI.
AG-UI requires a more complicated setup to work with Spring AI. Chat Agent UI is still a valid choice for simple testing scenarios.
When building chat agents (conversational agents), it's essential to have some tools to test the agents. The agent may expose a REST API, so it can be tested using tools like Postman, or using Swagger UI. It's better to use a GUI tool when testing agents.
Chat Agent UI is a small library to provide a chatbot-like UI when testing agents. It's built using assistant-ui with a custom LocalRuntime which talks to the backend API.
The UI sends requests to /chat and receives streaming responses using Server-sent events. Request and response formats come from assistant-ui.
Client
To use the UI, you need to add the Maven dependency to your project, replacing ${chat-agent-ui.version} with the latest version.
Latest version:

<dependency>
    <groupId>com.javaaidev.chatagentui</groupId>
    <artifactId>chat-agent-ui</artifactId>
    <version>${chat-agent-ui.version}</version>
</dependency>
This JAR contains client-side files and is packaged as a webjar.
Server
For the server side, it must expose a REST endpoint at /chat which accepts POST requests.
Model
The request body type is ChatAgentRequest, while the response body type is Flux<ServerSentEvent<ChatAgentResponse>>.
ChatAgentRequest and ChatAgentResponse are defined in the following module.
Latest version:
Javadoc :

<dependency>
    <groupId>com.javaaidev.llmagentspec</groupId>
    <artifactId>chat-agent-model</artifactId>
    <version>${llm-agent-spec.version}</version>
</dependency>
Versions
chat-agent-model has versions match to Spring AI versions.
- For Spring AI 1.x, please use version
1.x. - For Spring AI 2.x, please use version
2.x.
Spring AI
For Spring AI applications, you can use the Spring AI adapter. This adapter provides utility methods to convert between models of chat agent and Spring AI.
Latest version:
Javadoc :

<dependency>
    <groupId>com.javaaidev.llmagentspec</groupId>
    <artifactId>spring-ai-adapter</artifactId>
    <version>${llm-agent-spec.version}</version>
</dependency>
Below is an example of Spring AI server-side code. ModelAdapter is used to convert models.
fromRequestconverts aChatAgentRequestto a list of Spring AIMessages.toStreamingResponseconverts aFlux<ChatResponse>to aFlux<ServerSentEvent<ChatAgentResponse>>.
package com.javaaidev.agent;

import static com.javaaidev.agent.Constants.SYSTEM_TEXT;

import com.javaaidev.chatagent.model.ChatAgentRequest;
import com.javaaidev.chatagent.model.ChatAgentResponse;
import com.javaaidev.chatagent.springai.ModelAdapter;
import org.springframework.ai.chat.client.ChatClient;
import org.springframework.ai.chat.messages.Message;
import org.springframework.http.MediaType;
import org.springframework.http.codec.ServerSentEvent;
import org.springframework.web.bind.annotation.PostMapping;
import org.springframework.web.bind.annotation.RequestBody;
import org.springframework.web.bind.annotation.RequestMapping;
import org.springframework.web.bind.annotation.RestController;
import reactor.core.publisher.Flux;

@RestController
@RequestMapping("/chat")
public class ChatAgentStreamingController {

  private final ChatClient chatClient;

  public ChatAgentStreamingController(ChatClient.Builder builder) {
    chatClient = builder.build();
  }

  @PostMapping(produces = MediaType.TEXT_EVENT_STREAM_VALUE)
  public Flux<ServerSentEvent<ChatAgentResponse>> chatStreaming(
      @RequestBody ChatAgentRequest request) {
    return ModelAdapter.toStreamingResponse(
        chatClient.prompt()
            .system(SYSTEM_TEXT)
            .messages(ModelAdapter.fromRequest(request).toArray(new Message[0]))
            .stream()
            .chatResponse());
  }
}
Non-Streaming
The UI is required to use streaming mode. If you are not using streaming of ChatClient, you can convert the ChatResponse into a Flux with only one element.
The code below shows an example of using non-streaming mode.
package com.javaaidev.agent;

import static com.javaaidev.agent.Constants.SYSTEM_TEXT;

import com.javaaidev.chatagent.model.ChatAgentRequest;
import com.javaaidev.chatagent.model.ChatAgentResponse;
import com.javaaidev.chatagent.springai.ModelAdapter;
import org.springframework.ai.chat.client.ChatClient;
import org.springframework.ai.chat.messages.Message;
import org.springframework.http.codec.ServerSentEvent;
import org.springframework.web.bind.annotation.PostMapping;
import org.springframework.web.bind.annotation.RequestBody;
import org.springframework.web.bind.annotation.RequestMapping;
import org.springframework.web.bind.annotation.RestController;
import reactor.core.publisher.Flux;

@RestController
@RequestMapping("/chat_non_streaming")
public class ChatAgentController {

  private final ChatClient chatClient;

  public ChatAgentController(ChatClient.Builder builder) {
    chatClient = builder.build();
  }

  @PostMapping
  public Flux<ServerSentEvent<ChatAgentResponse>> chat(@RequestBody ChatAgentRequest request) {
    if (request == null) {
      return Flux.empty();
    }
    var messages = ModelAdapter.fromRequest(request);
    var chatResponse = chatClient.prompt().system(SYSTEM_TEXT)
        .messages(messages.toArray(new Message[0]))
        .call()
        .chatResponse();
    if (chatResponse == null) {
      return Flux.empty();
    }
    return ModelAdapter.toStreamingResponse(Flux.just(chatResponse));
  }
}
UI
After starting the server, the UI can be accessed from path /webjars/chat-agent-ui/index.html.
See the screenshot below. If the model provides reasoning output, this output will also be displayed.
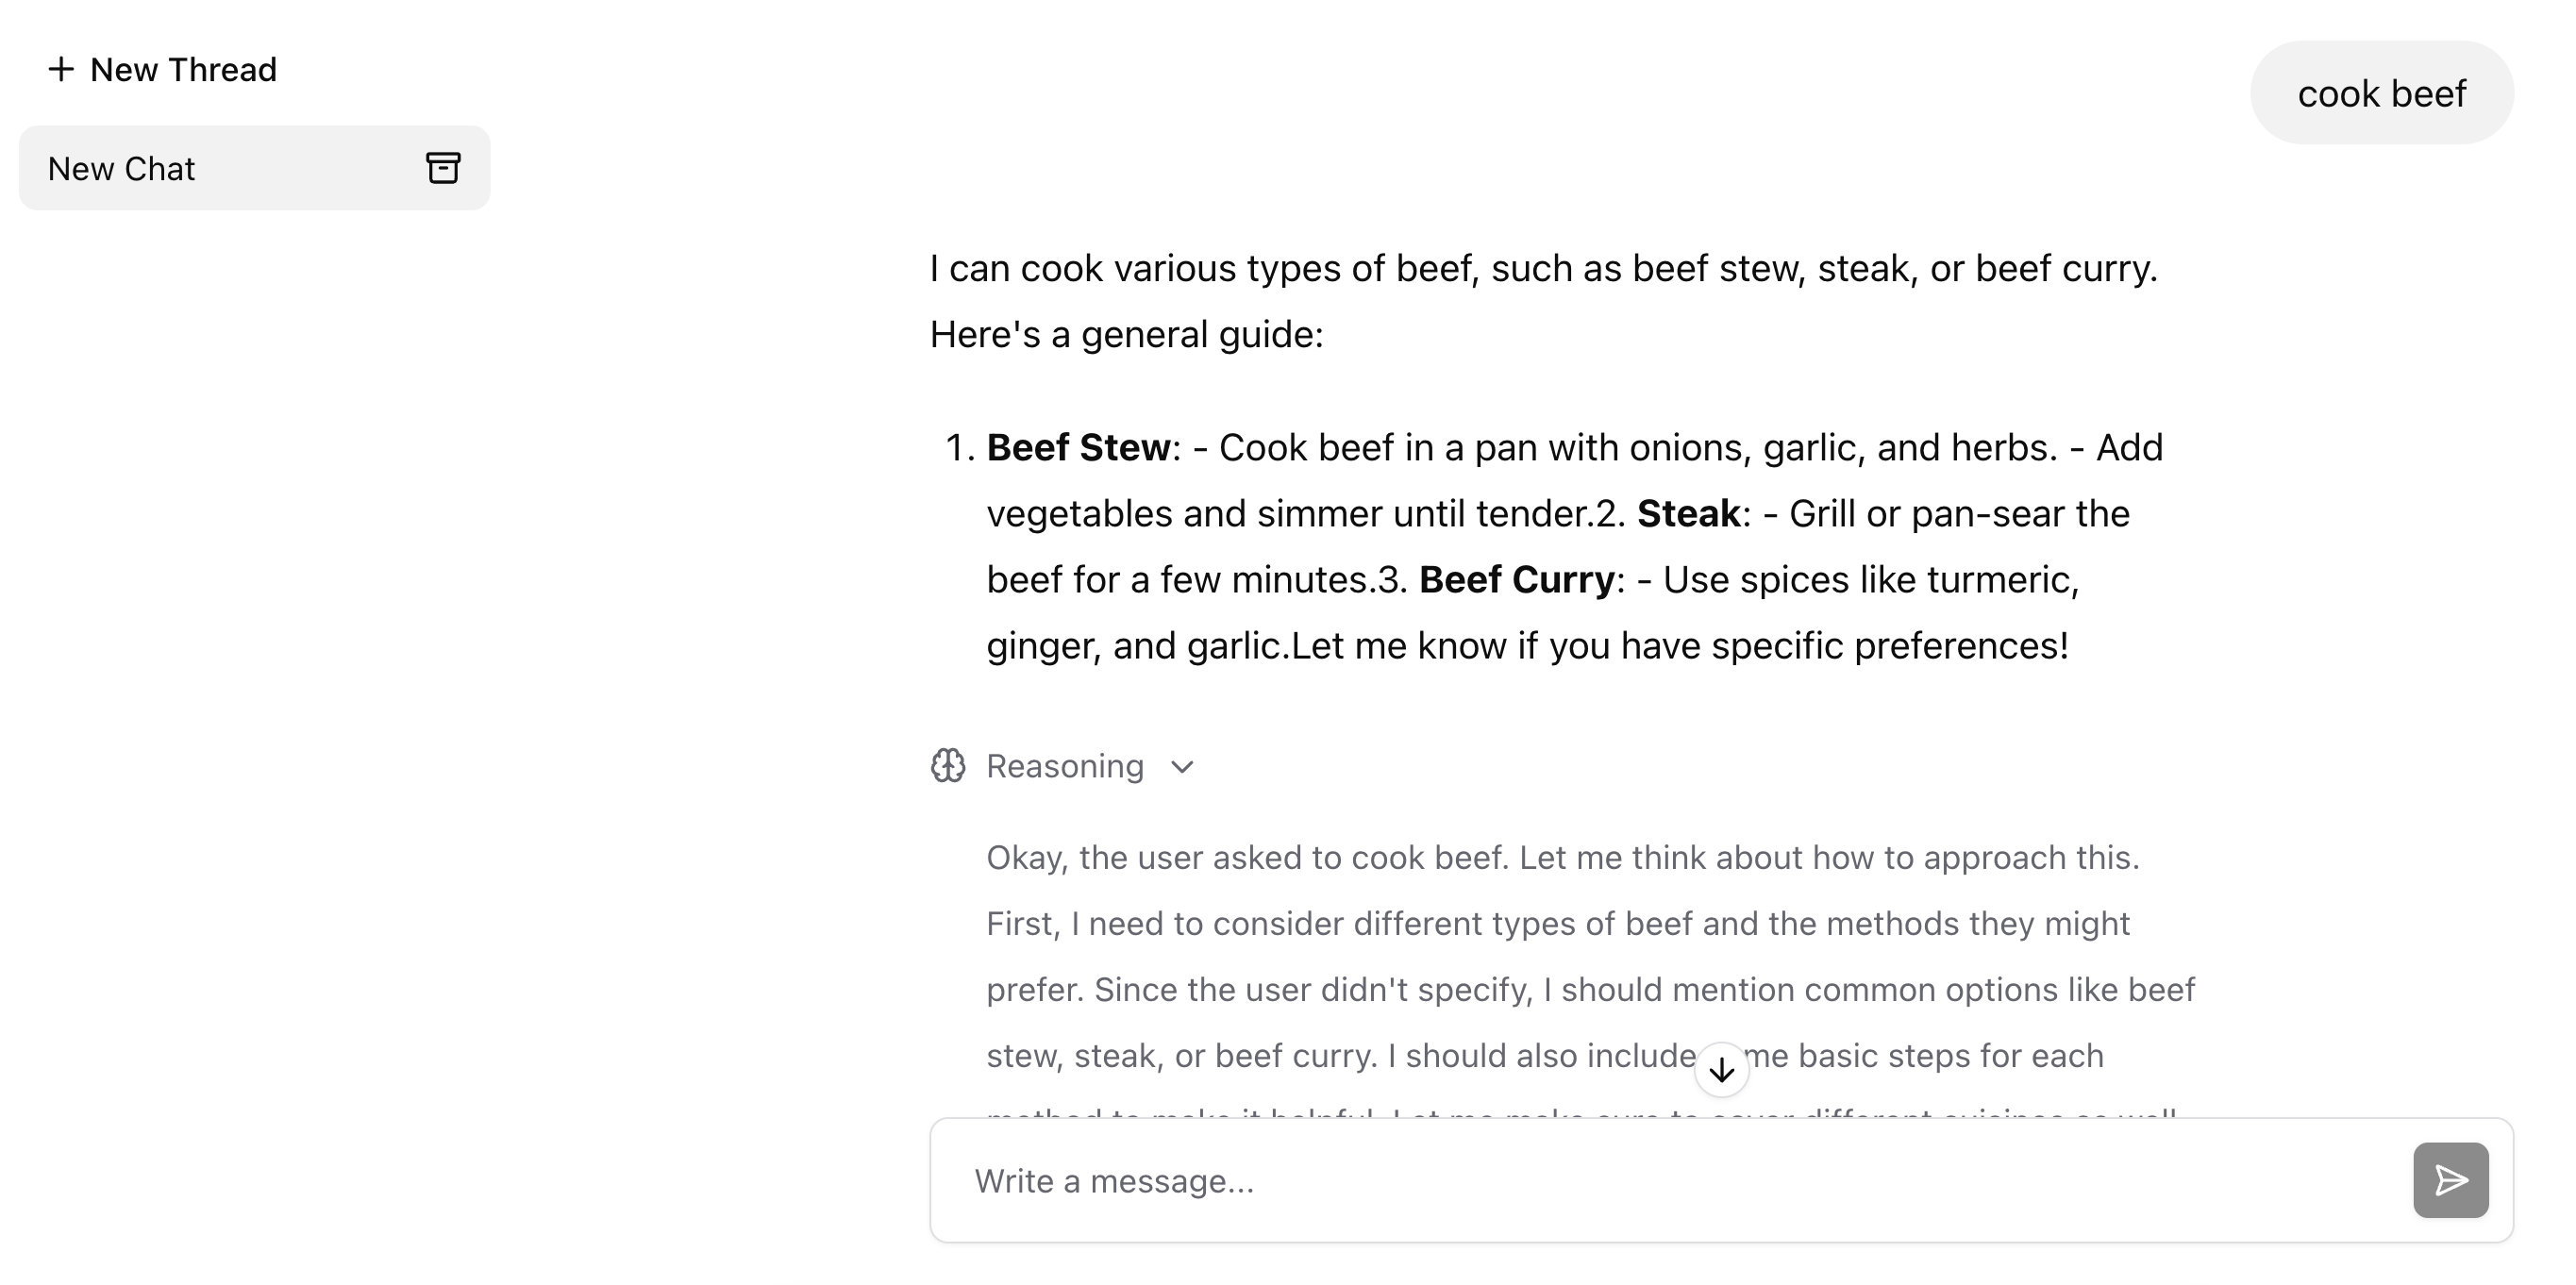
You can also add images and text files.